Getting started
The first-launch setup wizard walks through eight steps: introduction, language and appearance, optional module downloads, sync, reading defaults, layout, panel content, and global defaults. You can revisit many of these choices later from the dashboard and settings.
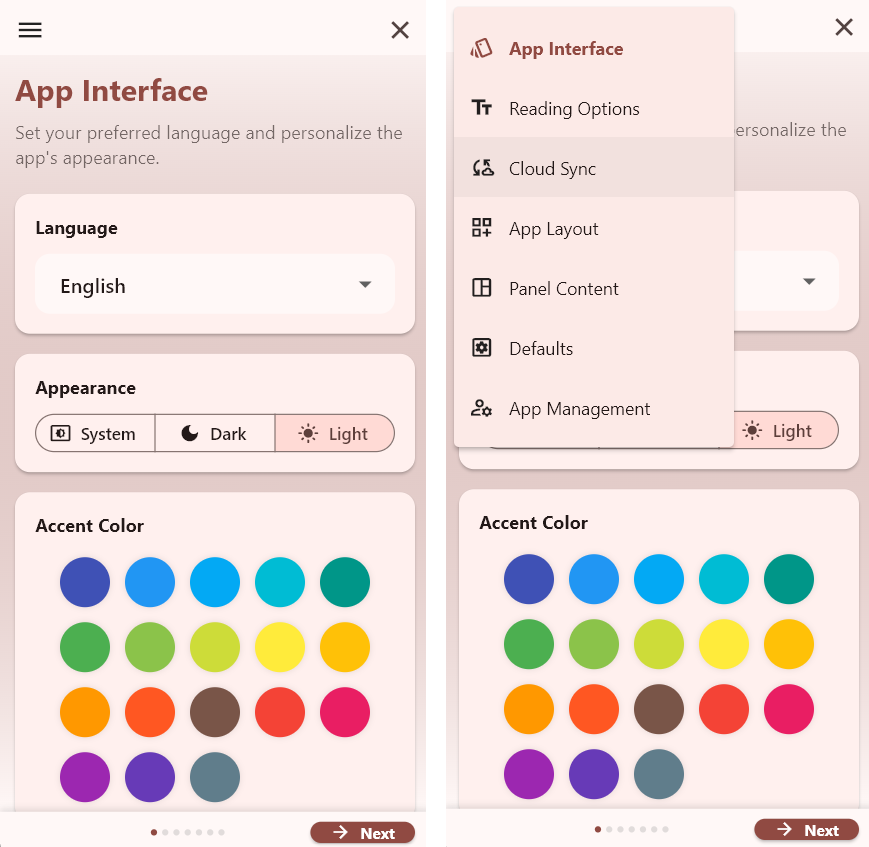
On a phone, the wizard is a single column with a bottom bar (Back, step dots, Next / Finish). The “Get Modules” step uses tabs and filters in a compact layout; collections may appear in a dropdown instead of a side list.
- Leaving step 3 (Get Modules) with Next starts downloading any modules you queued.
- App layout only offers three-panel presets when the window is wide enough; on narrow screens you see one- and two-panel options.
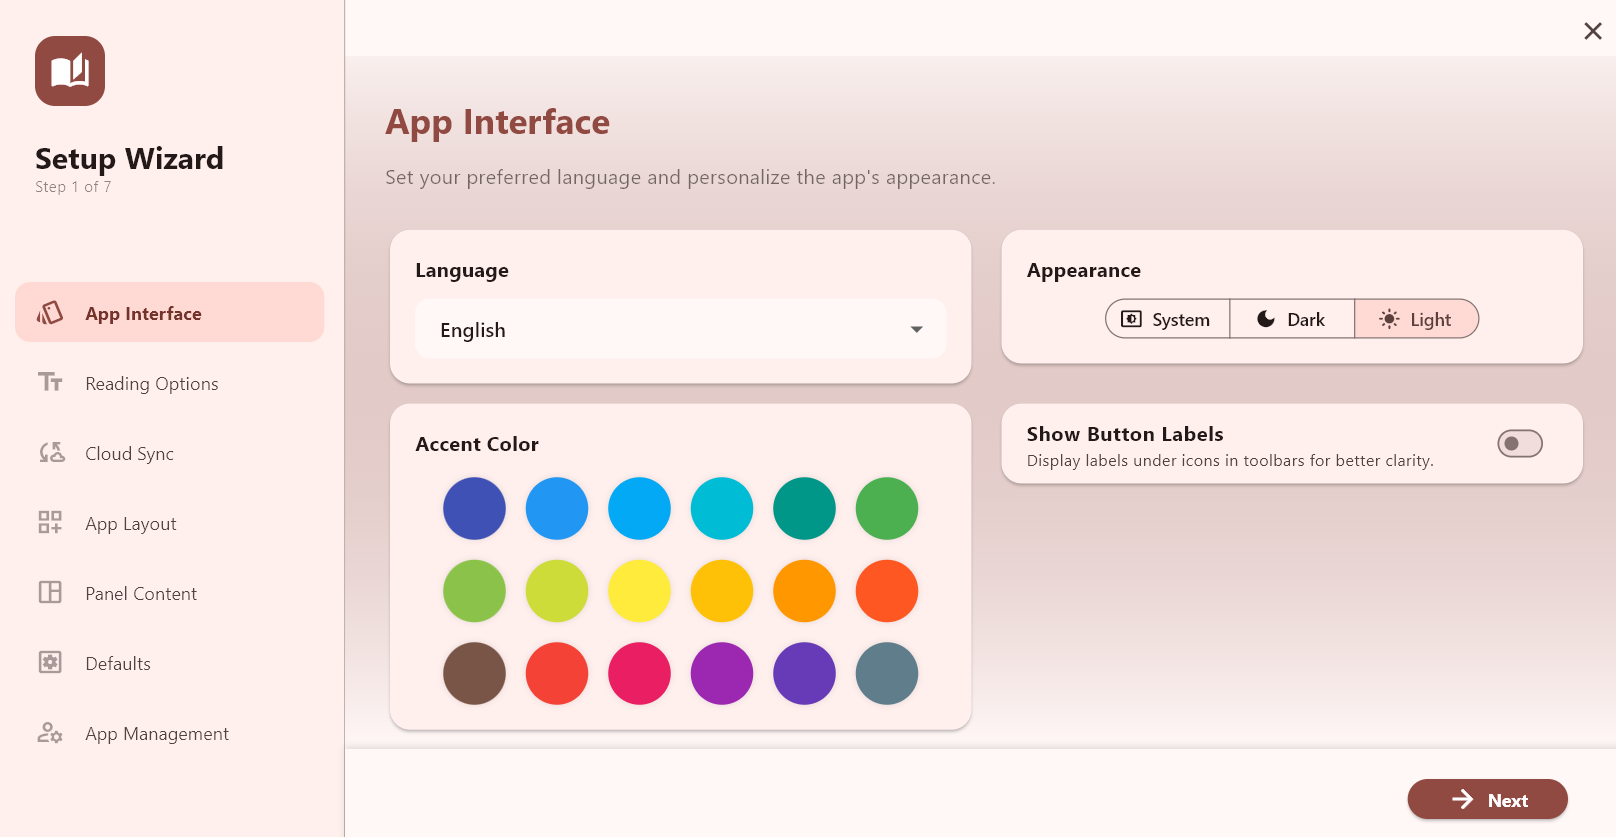
On tablet and desktop, a left sidebar lists all steps (tap any step to jump). The main area shows the current step. The same Back / Next / Finish bar appears at the bottom.
- The module step can show collections beside the list on wide layouts.
- Extra three-panel layout thumbnails appear when the window is wider than about 600px.
Wizard chrome (every step)
- Back — previous step (hidden on step 1).
- Next — advance; on the last step the button reads Finish with a check-style icon and saves your profile as Default, then opens the main dashboard.
- Progress — on narrow layouts, dots under the bar show which step you are on; on wide layouts, the sidebar highlights the current step and marks earlier steps with a check when passed.
Step 1 — Introduction
Title: “Welcome to iBible Study” (wording may match your build).
- Welcome banner — hero image and short intro paragraph.
- Feature highlight cards — three read-only cards: Powerful Study Tools, Modular Layouts, Global Sync (icons and short subtitles).
- Tip — reminder that you can change settings later in the app.
No settings are saved on this step; it is informational only.
Step 2 — App interface
Sets language, theme, accent, and toolbar labels.
- Language — dropdown: English, Arabic, Spanish, Brazilian Portuguese, German, Chinese, Greek, French, Hindi, Indonesian, Russian, Korean, Swahili, Tagalog (and any additions your build ships). Changing language applies UI strings immediately.
- Appearance — segmented control: System, Dark, Light.
- Accent color — tap a circle to set the app theme seed color; the selected swatch shows a checkmark.
- Show button labels — switch: show or hide text under toolbar icons.
Step 3 — Get modules
Inline module browser and download queue (same sources as the full module manager).
- Collection — choose which catalog/collection to browse (sidebar on wide layouts, dropdown on narrow).
- Search — filter the list by name or metadata.
- Language filter — narrow modules by language, or All.
- Selection status — shows how many modules are queued; supports multi-select batch download.
- Tabs — Bibles, Headers, Dictionaries, Commentaries, Books: pick modules per category; each row typically offers download/add actions consistent with the module list UI.
- Next — when you leave this step, the app starts downloading queued modules in the background.
Step 4 — Cloud sync
- Enable cloud synchronization — master switch for Google Drive–based sync.
- When sync is on: Link Google account — taps through sign-in; when connected, status shows as linked with optional sign out (logout icon) and a confirmation dialog.
- Multi-device — informational card (Windows, Android, iOS via Drive).
Step 5 — Reading options
Defaults for Bible, commentary, and book text (stored for the main reading scale and spacing).
- Preview — live sample paragraph updating as you change font, size, and line spacing.
- Font family — dropdown (e.g. Tahoma, Arial, Times New Roman, Georgia, Verdana, Trebuchet MS, Courier New, Palatino — as offered in the app).
- Font size — slider (roughly 50%–250%, shown as a percentage).
- Line spacing — slider with numeric value.
- Pinch to zoom — switch to allow or disable pinch-zoom inside reader content.
Step 6 — App layout
- Layout thumbnails — tap one to select. Always available: single panel, two horizontal, two vertical.
- When the window is wider than about 600px, additional three-panel presets appear (horizontal/vertical combinations).
- The selected layout uses a highlighted border and fills in the wizard’s layout state.
Step 7 — Panel content
Chooses the initial tab/book type per panel for your selected layout.
- Panel 1 — dropdown: starting tab type (Bible, Commentary, Dictionary, Book, Map, Notes, Search, Tools, etc.—the app’s book-type list).
- Panel 2 — same, shown only if your layout has two or more panels.
- Panel 3 — same, shown only for three-panel layouts.
Step 8 — Defaults
Primary Bible and dictionary defaults for popups and Strong’s behaviour. If you skipped downloads, you may see a warning until Bibles are installed.
- If no Bibles are installed — message to go back and download modules; dropdowns are omitted.
- Select default Bible — dropdown over installed Bible modules.
- Default Strong (Hebrew) and Default Strong (Greek) — shown when Strong’s-capable dictionaries exist; pick default lexicons.
- Default morph dictionary — shown when a morphology dictionary is available.
- Strong number interaction — radio: Show popup vs Open in dictionary tab when tapping a Strong’s number in the Bible.
After the wizard
Finishing saves the profile as Default and marks first launch complete. To run through setup again later, use layout profiles or app settings that re-open the wizard (without the intro step, and with an optional App management step for version, modules folder, cache rebuild, and reset—for example when creating a new profile).